Quantize regions
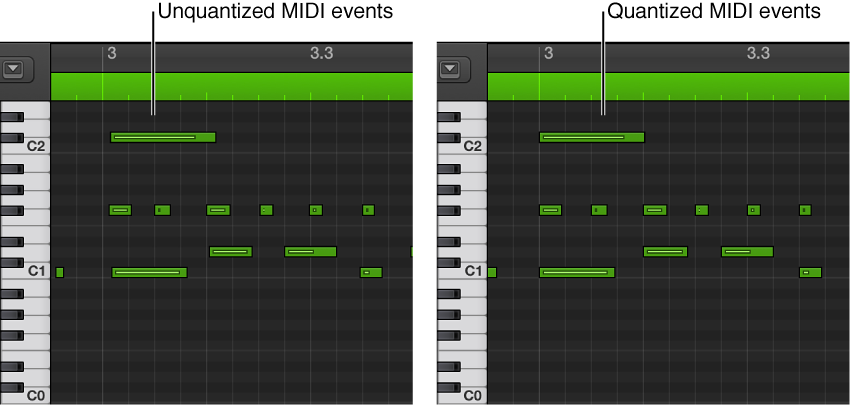
Quantizing involves the rhythmic correction of audio or MIDI regions to a specific time grid. Any notes not played in time are moved to the nearest position on the grid.
You can quantize regions in the Tracks area by using the Quantize parameter in the Region inspector. Several advanced quantization parameters are also available in the Region inspector for greater control over quantization.
Before you quantize audio regions on an audio track, you must assign a flex mode to the audio track, and select the Flex parameter in the Region inspector for that region. For details, see Flex Time algorithms and parameters.
The Quantize parameter in the Region inspector applies to whole regions. If you want different parts of a region to have different Quantize values, you can split the region, apply different quantize settings to different segments, and then join them using the Join command or the Glue tool.
Quantize selected regions
-
Choose a value from the Quantize pop-up menu in the Region inspector.

You can also step through the available Quantize values, one at a time, with the Set Quantize Parameter to Next Value and Set Quantize Parameter to Previous Value key commands.
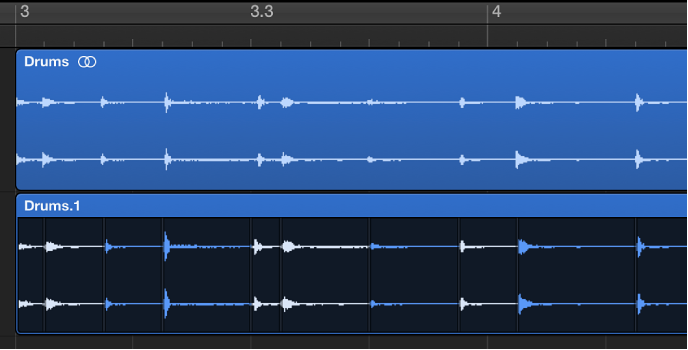
When you quantize audio regions, white lines called quantize flex markers appear over the selected audio regions, to indicate where audio has been time-stretched during the time quantization process.

The quantization grid for a MIDI region always begins at the start of the region. If the MIDI region is not aligned with the beginning of a bar, neither is the quantization grid.
Important: For MIDI regions, the chosen Quantize value affects the way notes are displayed in the MIDI editors. So, for example, you can see the effect of the chosen Quantize value by looking at the note positions in the Piano Roll Editor.

For detailed information about Quantize values and advanced Quantize parameters, see Quantize parameter values and Advanced quantization parameters.