Markers overview
![]() When Show Advanced Tools is selected in the Advanced preferences pane, you can use markers to tag different parts of a project, and quickly select the parts for playback, arranging, and editing. Markers can help you organize your project, and also act as storage areas for locator positions.
When Show Advanced Tools is selected in the Advanced preferences pane, you can use markers to tag different parts of a project, and quickly select the parts for playback, arranging, and editing. Markers can help you organize your project, and also act as storage areas for locator positions.
There are several ways to create and edit markers in Logic Pro. You can view and edit markers in the following work areas:

Marker track: Displays markers as rectangular sections. You can select, copy, move, or resize markers in the Marker track.

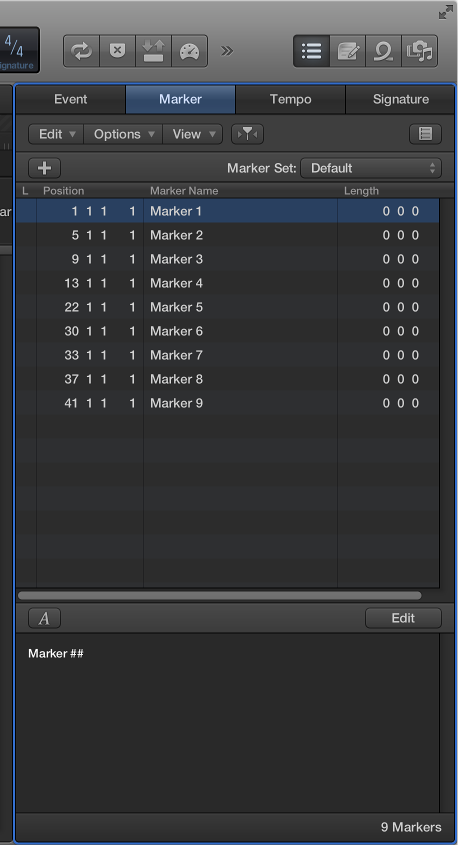
Marker List: Displays marker names, bar position, and length information in a scrollable, editable list.
Marker Text area and Marker Text window: Display marker text. You can type and edit comments or other text that is saved with the marker.
Show the Marker track
Do one of the following:
Choose Track > Global Tracks > Show Global Tracks, or use the Show/Hide Global Tracks key command (G).
Click the Global Tracks button
 .
.
If the Marker track is not visible, Control-click anywhere in the global tracks header area, then choose Marker in the dialog that appears. For more information, see Show and hide global tracks.
Open the Marker List in the main window
Click the List Editors button
 in the control bar, then click the Marker button.
Open the Marker List as a separate window
Do one of the following:
Choose Navigate > Open Marker List.
Drag the Marker List out of the main window.
Open the Marker Text window
Do one of the following:
Choose Navigate > Open Marker Text.
Option-double-click any marker in the Marker track with the Pointer tool.
The Marker Text window is also available at the bottom of the Marker List, where it’s called the Marker Text area.
Tip: Many marker-related commands can be accessed by Control-clicking in the Marker track or Marker List, when the Right Mouse Button: Opens Shortcut Menu pop-up menu option is chosen in the Logic Pro > Preferences > General > Editing pane.